Managing Projects
Agile.net stores information about software assemblies and protection settings inside a project. Using the UI you create a project and add all software assemblies comprising your software. You can save the result to XML-based file, which can later be run using the Agile.net command line tool.
Creating New Project
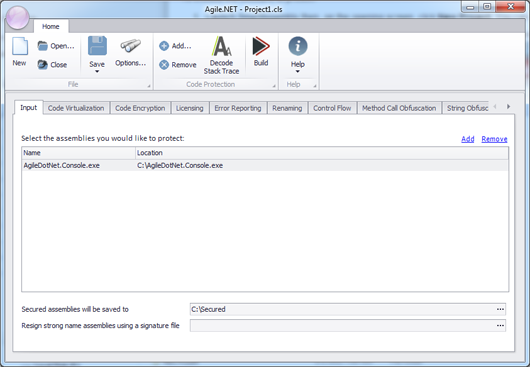
- Run Agile.net, by default a new project opens. If you were already editing another project, click the New button to close existing project and create a new one.
- Click the Add... button located on the main ribbon bar to browse to the location of the assemblies you want to use with Agile.net. It's recommended that you add all assemblies comprising your software, even ones you don't wish to protect as Agile.net will copy these assemblies to the output directory.
- Set the destination for the output directory, by default Agile.net will set the output directory to a folder named 'Secured' under the location of the first assembly added in previous steps.
- In case your code is signed, select the same strong name key file used to sign the software. Agile.net will use the key file to resign the assemblies after applying the protection operations.
Opening an Existing Project
To open a project you've been working with recently, click the Agile.net button (the big circle in the upper-left corner). Select the project from the recent project list displayed on the right. To open an existing project that is not shown in the list, click Open... to browse to an existing project.
Saving a Project
To save a project, click the Save button, to save the project to a different file click the down arrow icon located beneath the Save button. A drop down menu opens, click the Save As... button. Browse to the location where you would like to save your project.